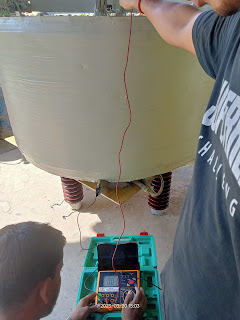
Introduction:
High voltage (HV) testing is a crucial procedure that ensures the safety and reliability of electrical panels and equipment. It involves subjecting the equipment to higher than normal voltages to identify potential insulation failures and defects. In this blog, we will walk you through the essential steps of conducting an HV test, ensuring the longevity and efficiency of your electrical systems. So, let's get started!
Step 1: Preparation
1.1. Safety First: Prioritize safety measures, including wearing appropriate personal protective equipment (PPE) such as gloves, safety glasses, and protective clothing. Make sure the testing area is secure and isolated to prevent accidental contact.
1.2. Familiarize Yourself: Understand the equipment's specifications and recommended test procedures. Consult the manufacturer's documentation or relevant industry standards for specific guidelines.
Step 2: Test Equipment
2.1. HV Test Equipment: Acquire or rent reliable HV test equipment capable of generating the required voltage levels. Ensure the equipment is calibrated and in good working condition.
2.2. Test Leads and Probes: Use high-quality test leads and probes that can handle the test voltage and provide accurate measurements.
2.3. Grounding: Properly ground the HV test equipment and the equipment under test (EUT) to prevent electrical hazards and ensure accurate results.
Step 3: Test Setup
3.1. Isolate the EUT: Disconnect the EUT from the power source and any other connected systems.
3.2. Visual Inspection: Perform a thorough visual inspection of the EUT, checking for any physical damage or abnormalities.
3.3. Cleanliness: Ensure the EUT is clean and free from any debris that could affect the test results.
3.4. Proper Connections: Connect the HV test equipment to the EUT following the manufacturer's guidelines and industry standards. Verify that the connections are secure and properly insulated.
Step 4: Conducting the Test
4.1. Pre-Test Measurements: Take baseline readings of voltage, current, and other relevant parameters, if applicable, to establish a reference for future comparisons.
4.2. Test Procedure: Follow the recommended test procedure specific to the type of HV test you are conducting (e.g., insulation resistance, dielectric withstand, partial discharge, etc.). Slowly increase the voltage to the desired level, monitoring the EUT's response throughout the process.
4.3. Monitoring and Recording: Continuously monitor and record the test parameters, including voltage, current, leakage currents, and any abnormal observations or changes.
4.4. Test Duration: Maintain the test voltage for the specified duration, typically following industry standards or manufacturer guidelines. Observe the EUT closely for any signs of insulation breakdown, sparking, or other irregularities.
Step 5: Post-Test Analysis
5.1. Test Results: Analyze the test data obtained during the test period, comparing it against the established baselines or acceptance criteria. Look for any deviations, failures, or anomalies.
5.2. Documentation: Document the test results, including all relevant data, observations, and any corrective actions taken.
5.3. Corrective Actions: If any failures or abnormalities are detected, determine the cause and take appropriate corrective actions. Repeat the HV test after resolving the issues to ensure the equipment's integrity.


0 Comments